
How to Install the LEMP Stack (Linux, Nginx, MySQL, PHP) on Debian

The LEMP software stack is a group of open-source software used to serve dynamic web pages and web applications. It stands for:
- Linux (Operating System)
- Engine-X (Nginx Web Server)
- MySQL (Database)
- PHP (Backend Processing)
While Apache embeds the PHP interpreter directly, Nginx uses an external program (PHP-FPM) to handle processing, acting as a bridge between the interpreter and the web server. This guide will walk you through setting this up on a Debian-based server.
Prerequisites
- A Debian-based Linux server (e.g., Debian 11/12 or Ubuntu).
- A user account with
sudoprivileges.
Step 1: Install Nginx Web Server
First, we will install Nginx to display web pages to site visitors. We will use the apt package manager.
- Update your package index:
sudo apt update
- Install Nginx:
The standardnginxpackage is fine, but thenginx-extraspackage includes additional useful modules (like HTTP headers and real-ip) that are often needed for advanced configurations later.
sudo apt install nginx-extras
Enter Y when prompted to confirm.
3. Verify the Installation:
Open your web browser and navigate to your server's IP address:
http://YOUR_SERVER_IP
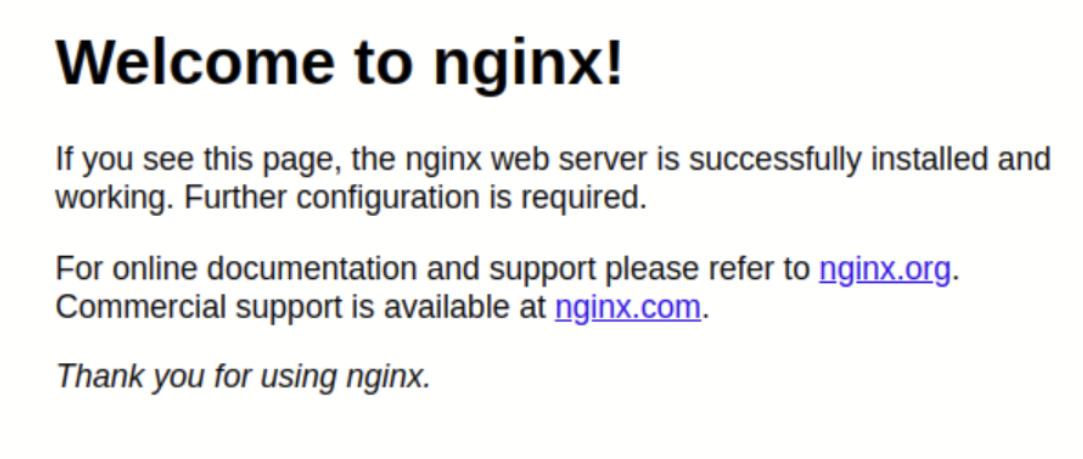
If you see the "Welcome to nginx!" default page, the web server is successfully installed.
Tip: If you don't know your IP address, run this command:
ip addr show eth0 | grep inet | awk '{ print $2; }' | sed 's/\/.*$//'
Step 2: Install MySQL
Next, we need a database system to store and manage data for your site.
- Install the MySQL Server:
On Debian,default-mysql-server(which usually installs MariaDB, a drop-in replacement for MySQL) is the recommended package.
sudo apt install default-mysql-server
- Secure the Installation:
It is highly recommended to run the included security script to remove insecure defaults (like anonymous users and test databases).
sudo mysql_secure_installation
Follow the prompts to set a root password and remove insecure options.
Step 3: Install PHP
Now we need PHP to generate dynamic content. Since Nginx does not contain native PHP processing, we will install php-fpm (FastCGI Process Manager) and php-mysql to allow PHP to talk to your database.
- Install PHP packages:
(We will use PHP 8.2 for this guide, as it is a modern standard).
sudo apt install php8.2-fpm php8.2-mysql
Step 4: Configure Nginx to Use PHP
We will now configure Nginx to use the PHP processor. Instead of modifying the default configuration, we will create a dedicated server block for your domain.
1. Create the Web Directory
Create a directory structure for your site, replacing your_domain with your actual domain name.
sudo mkdir -p /var/www/your_domain
2. Assign Permissions
Assign ownership of the directory to your current user (referenced by $USER) so you can edit files without sudo.
sudo chown -R $USER:$USER /var/www/your_domain
3. Create the Server Block
Open a new configuration file in Nginx’s sites-available directory:
sudo nano /etc/nginx/sites-available/your_domain
Paste the following configuration.
server {
    listen 80;
    server_name your_domain www.your_domain;
    root /var/www/your_domain;

    # Add index.php to the list if you are using PHP
    index index.html index.htm index.php;

    location / {
        # First attempt to serve request as file, then
        # as directory, then fall back to displaying a 404.
        try_files $uri $uri/ =404;
    }

    # Pass PHP scripts to FastCGI server
    location ~ \.php$ {
        include snippets/fastcgi-php.conf;

        # This must match the version you installed in Step 3
        fastcgi_pass unix:/run/php/php8.2-fpm.sock;
    }

    # Deny access to .htaccess files, if Apache's document root
    # concurs with nginx's one
    location ~ /\.ht {
        deny all;
    }
}
Save and close the file (CTRL+X, then Y, then ENTER).
4. Enable the Configuration
Link your new file to the sites-enabled directory and unlink the default configuration to prevent conflicts.
sudo ln -s /etc/nginx/sites-available/your_domain /etc/nginx/sites-enabled/
sudo unlink /etc/nginx/sites-enabled/default
5. Test and Reload
Check for syntax errors:
sudo nginx -t
If the output says syntax is ok, reload Nginx:
sudo systemctl reload nginx
Step 5: Verify the Setup
1. Create an HTML Test File
Create a simple HTML file to ensure Nginx is serving your new directory.
nano /var/www/your_domain/index.html
Paste this content:
<html>
  <head>
    <title>Welcome to your_domain!</title>
  </head>
  <body>
    <h1>Success! The server block is working.</h1>
  </body>
</html>
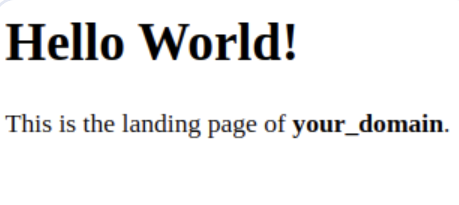
Save and close. Visit http://your_domain (or your IP) in your browser. You should see the success message.
2. Create a PHP Test File
Create a file to verify that PHP is working and connecting to Nginx.
nano /var/www/your_domain/info.php
Paste this content:
<?php
phpinfo();
Save and close. Now visit:
http://your_domain/info.php
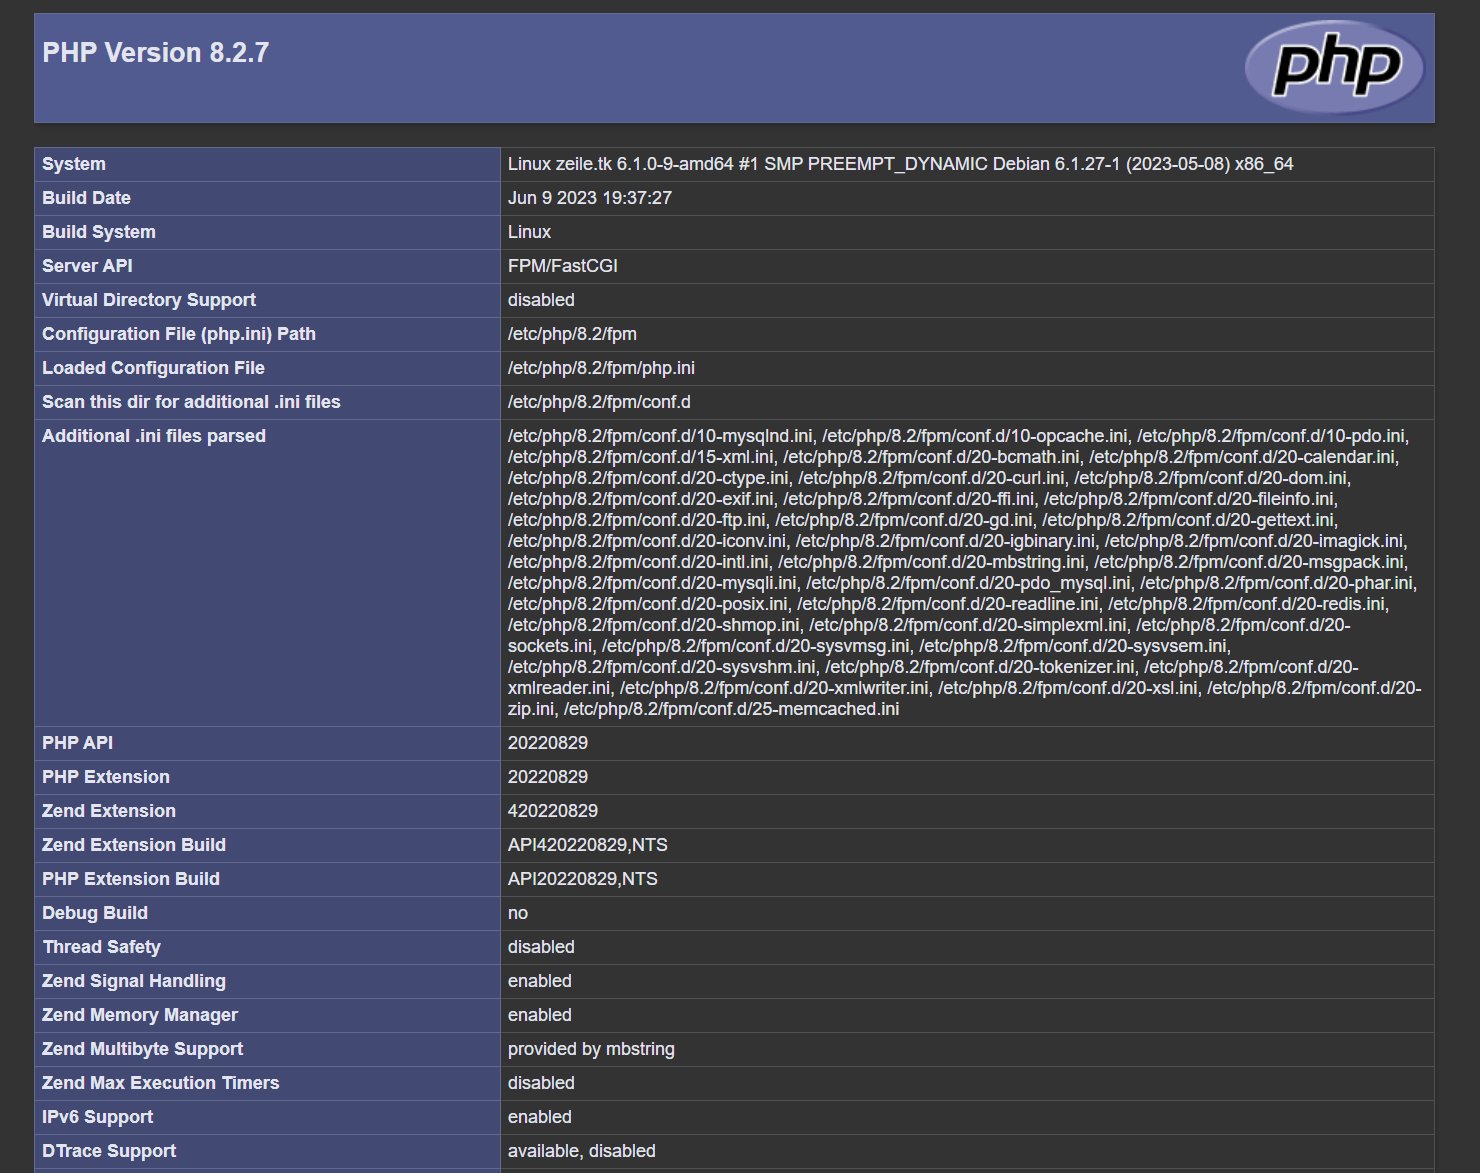
If you see a page with purple headers and detailed server information, PHP is working correctly.
Security Warning: Once you have verified PHP is working, remove this file immediately, as it displays sensitive server information to the public.
rm /var/www/your_domain/info.php